The Simplest Way to Create Email Templates in Apple Mail
I use Apple Mail and I write a lot of emails. Many of these emails are very similar; mostly responses to customer service requests or other re-appearing topics that I have similar answers to. Therefore, I started to create templates for my most common emails. Considering that you’re reading this, I assume that you have a similar desire and also use Apple Mail on macOS.
Other Methods
There are guides that describe how to manage templates with a separate mailbox, which uses the Draft functionality. I didn’t like that as you have to navigate around Apple Mail to access the desired email template. My method however, is quick to access right from within the email editor window as its beauty is to use the Signature feature. Easier and quicker than drafts, especially for short templates.
How To Use Your Email Templates
When you’re in the email editor, you can access all of your templates via the Signature feature – that’s it.
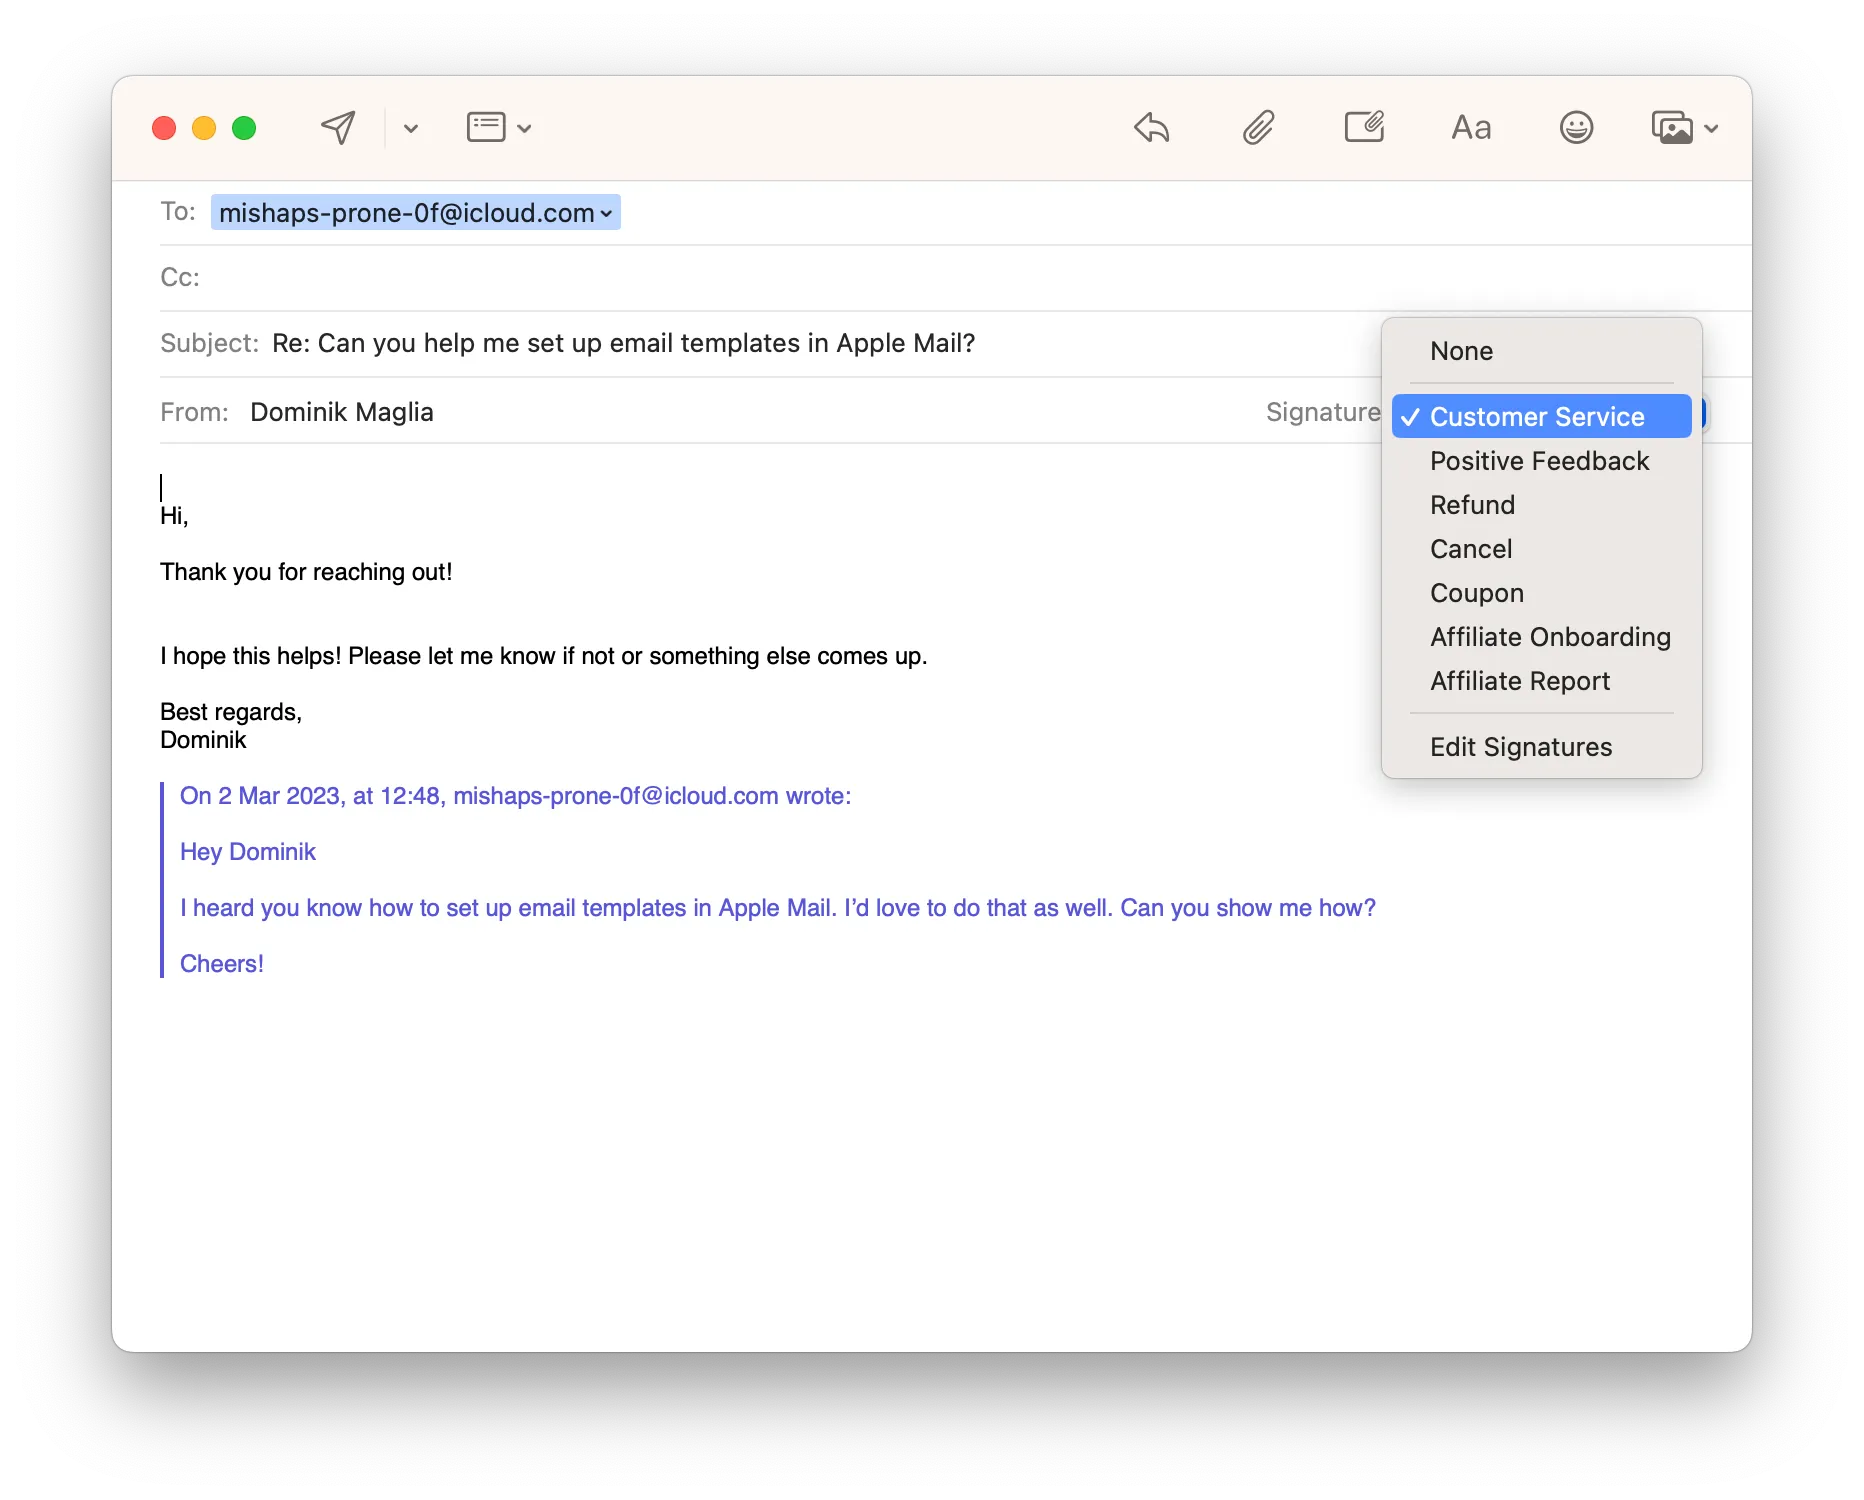
To use one of your templates, just select the appropriate Signature and edit the pasted template to match your desired message.
I have a few standard templates set that either contain most of the desired content or just the beginning and the end of my messages. Feel free to copy them.
How To Create and Manage Your Email Templates
Signatures are managed within Apple Mail’s preferences and must be assigned to the respective email accounts. This also gives you the flexibility to manage templates according to the different needs of your different email accounts, if desired.
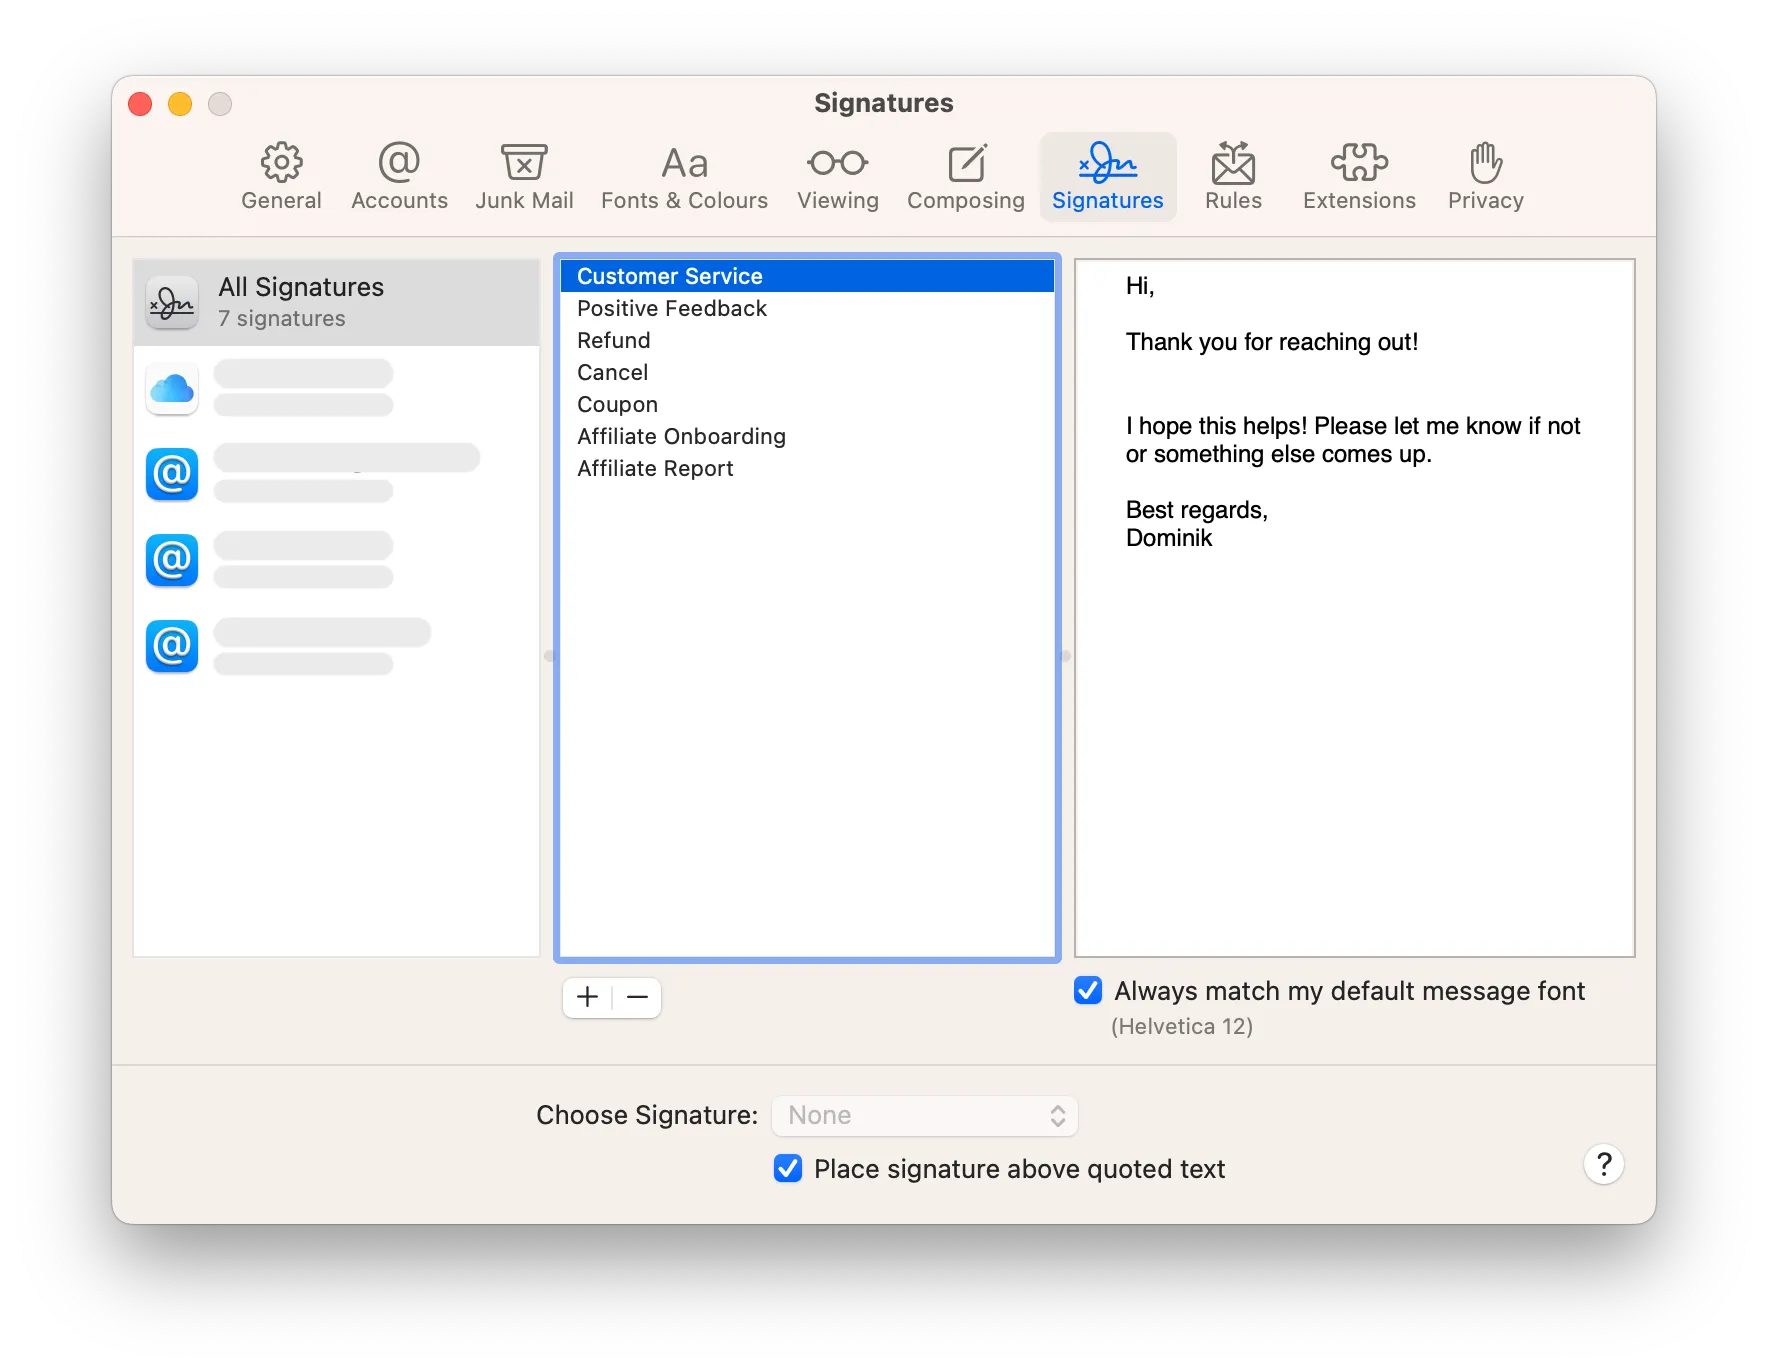
Simply press ”+” to create a new signature, then drag it to the mail account on the left.
This method is really simple and has already worked for me for quite some time. I’ve shown this for macOS and a similar approach can be used on iPhone and iPad, but limited to one signature.
That’s already it. I hope this quick guide is useful to you and may also save you precious time that you can invest otherwise. Take care!
— Dominik